


Whether you are switching from a PC to Mac or just need to transfer some files between the two, there are several ways to go about it. There is a simple way of sharing files using the operating systems’ built-in tools, but some third-party solutions may come in handy. Read on to learn about several go-to methods for sharing files between Mac and Windows.
Before explaining how to use the systems’ native tools to transfer files, please note this method is only possible if both computers are on the same local network. If this is not the case, feel free to head to the third-party solutions section below.
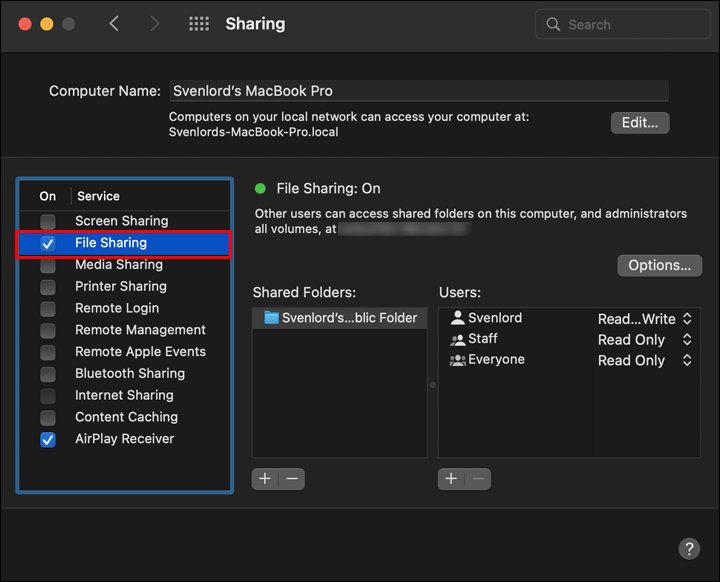
For Windows users to access your Mac files, you need to turn on file sharing and enable SMB sharing. Here’s how to do it:
Enabling file sharing on Macs follows the same steps in macOS Monterey 12, macOS Big Sur 11.0, macOS Catalina 10.15, macOS Mojave 10.14, and macOS High Sierra 10.13.
After the file-sharing set-up with the Windows user, you’ll be back on the Sharing window. Choose the folders and users you want to share with them:


For removing folders or users, use the “minus” button.
Now it’s time to do the actual sharing. Head over to your Windows computer and follow the steps below to transfer files from Mac to Windows:


File Explorer will display a folder with files and users you’ve granted permission to access through Shared Folders and Shared Users.
This connecting process to Mac should be identical in Windows XP, Windows Vista, Windows 7, Windows 8, Windows 10, and the latest Windows 11.
Remember to deselect all the user accounts before turning off Windows sharing because the users’ passwords are not stored securely.
Read on if you want to go the other way around and share files from Windows to Mac. The steps are relatively simple and divided into three stages.
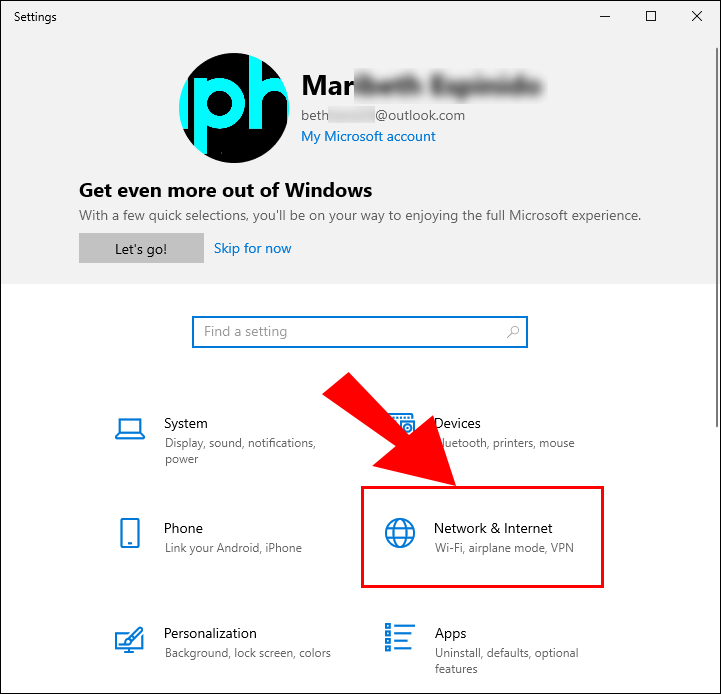
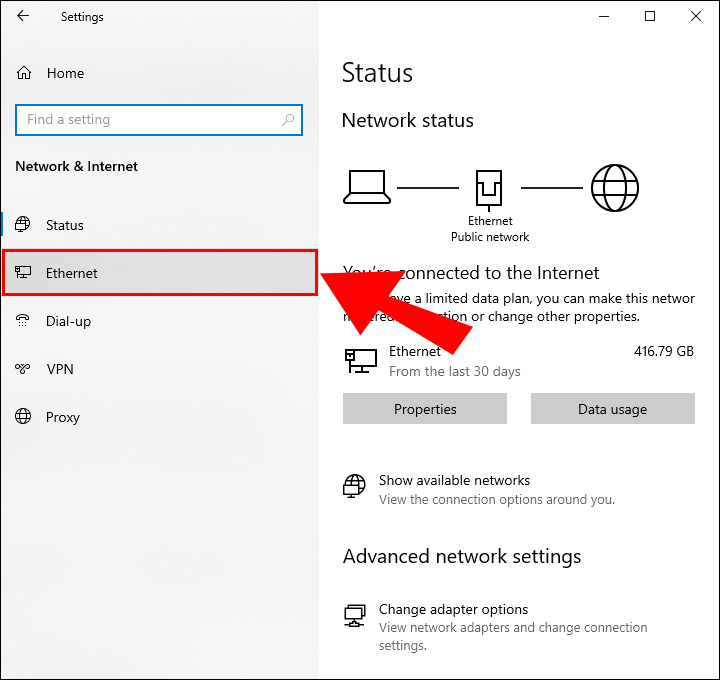
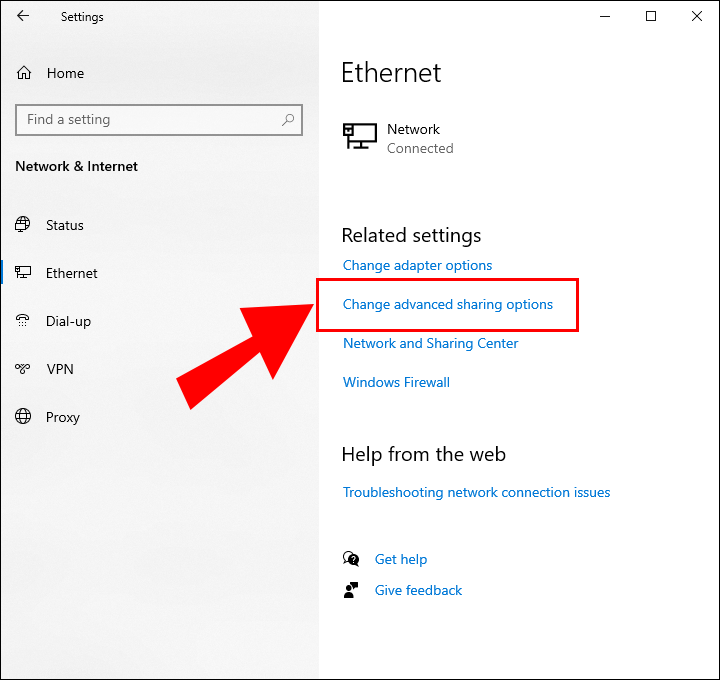
The first stage entails setting up file sharing on your PC. Start with making sure that Network Discovery is turned on in Windows:


Now that the PC has been given the green light to share files, choose the files and folders you want to share and follow the steps below for each one:


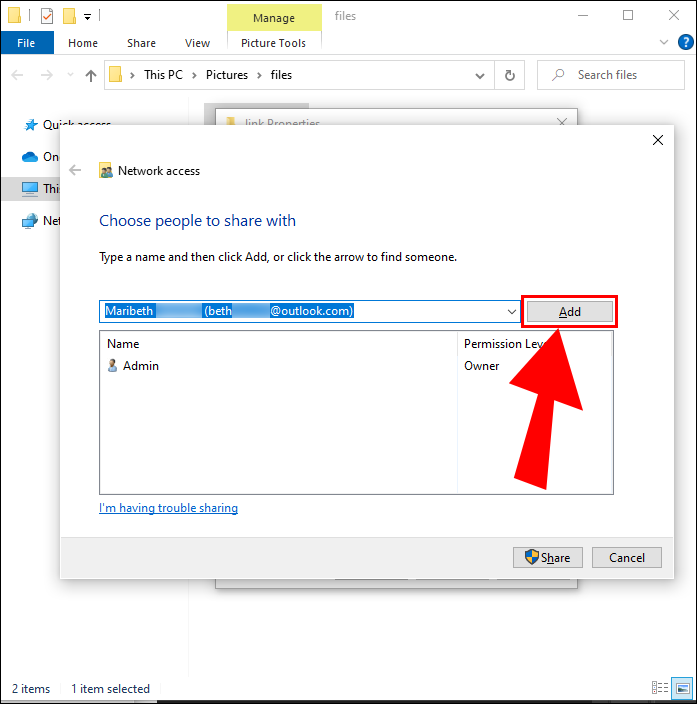


Once you’re all done with choosing the files to share, it’s time to access those files from your Mac:


The content you shared from Windows will be available in the Shared section of Finder. To transfer files, just drag and drop them to your desired location.
As we’ve explained, it’s smooth sailing if the Mac and PC are on the same local network. If not, there are other ways to transfer your files listed below:
If you’re not particularly tech-savvy, this might be your best option.
Most cloud services like Dropbox or GoogleDrive have apps available for Windows and macOS. Plus, they are free and fairly easy to use. Simply install the apps in your system and either copy and paste or drag and drop the desired files onto the cloud drive. The systems will then sync up, and the files will show up on your second system.
A quick and straightforward way to transfer files between Mac and Windows is using a USB stick. You can move the files and folders onto the stick and plug them into your second system. Just make sure to choose the exFAT file format as it is compatible with both systems. This method works best if you only need to transfer a smaller number of files.
If you need to transfer multiple files between Mac and Windows, this is the way to go. They offer different storage capacities, with the most popular being 1TB or 2TB. When using a portable hard drive, also format it to FAT32 to get access for both Mac and Windows OS systems.
Now that we’ve shared our go-to methods for transferring files between PC and Mac, the rest is up to you. Choose the best option for you and start sharing files to your heart’s content. If both computers share a network, you can keep it in the family and use their built-in tools for file sharing. If not, you can always use a cloud service, USB stick, or portable hard drive.
Have you ever had to share files between Mac and Windows? What method did you use? Let us know in the comment section below.